Writing READMEs that will make future you happy
March 6, 2017
Most of us struggle to decide what to include when documenting our projects, but some research can make the process a lot easier.
Are you:
- Posting your first project to a repository and aren’t sure how much to share about your program?
- Improving documentation of an existing project to encourage others to contribute?
What makes a README?
Let's not sweat the Markdown, the flashy demos and screenshots, or the badges just yet. Good READMEs are more about clear writing - clearly stating what problem your program solves, it's use, and (if you're looking for contributors) ways of getting folks familiar and able to jump on board - than they are about all the flashy "extras". You may have used outlines to organize your thoughts and test the strength of your thesis when writing. Sketching out an outline also helps get the “blank page” fears out of the way, so let’s begin to fill this in with the information your documentation should always include.
Core Components
You should always include an introduction to the project (and the problem it solves), list any programs or modules your user will need to have as requirements, and installation instructions. Most READMEs include troubleshooting information and a call to action if the author is hoping for contributors. Remember your goal: You are providing information to help someone use or improve your code. What do they need?
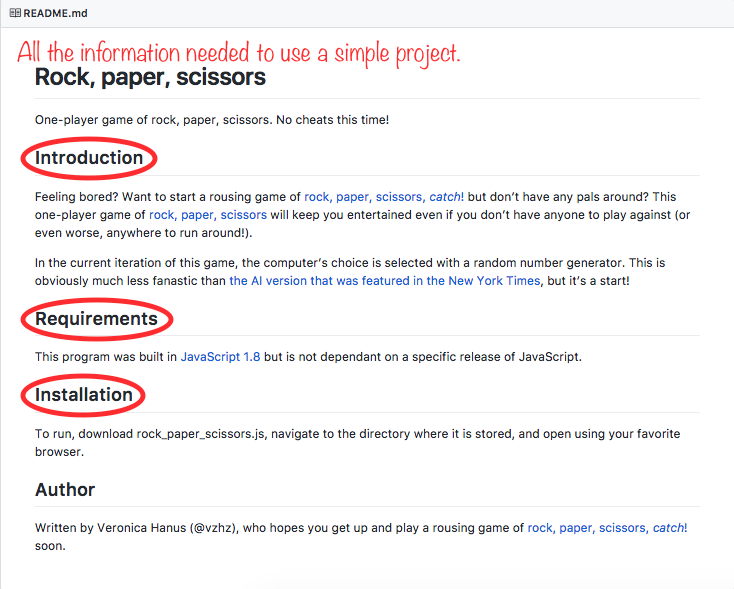
A README that includes all the information needed to run a simple program.
The Selfish REA(D)ME (a la The Selfish Gene/Meme)
In the beginning, most projects have one contributor, and I learned that the READMEs that other folks found the most helpful were the ones that I had written not for an imagined future user, but for my future self. If I were to rediscover this project three years from now, what would help me start using it again? What would help me make my first commit after being away from the code (and the problem it solves) for so long? These questions guide the first draft of every README I write.
Putting your best foot forward
Even if you have been writing and testing your program alone in your living room, you recognize that writing code is more exciting when it's used and appreciated by others. It's now time to step outside your own head, put your "user hat" on, and think about why someone might want to use your project. What will they wonder when they stumble on your README? I usually have a friend read my first draft over and ask them what they learned about my project, a technique called "say back" among writers. If they didn't glean what I'd hoped, I adjust my emphasis.You can take the "have a friend read it" approach one step further by attending sprints (project-centered work parties) or "docathons" (hackathons focused on documentation, click here for information on one that took place recently, including presentation slides and a slack channel) that support other open source projects. I've found that reviewing other projects' documentation by following their instructions for contributing will teach you a lot about what your own first-time contributors will benefit from! "Taking a walk in your contributors' shoes" is an essential step toward becoming a compassionate documentation writer.
If you can throw in a little humor, most readers will appreciate it provided all the important elements of the README are still easy to find. This version of the game "bottles and kegs" was a project I stumbled upon months ago and it still makes me chuckle.
As you become more comfortable with your writing, you can investigate using visuals to inform your reader about your project.
There are many options:
- Screenshots allow potential users to preview your program's results and inspire confidence. You can add them to your document as you would an image, with
. - Inline or block code snippets separate your descriptions from commands, helping users find your instructions quickly and making your troubleshooting examples clearer.
- GIFs and videos are nice ways to sprinkle some humor into an otherwise bland README or quickly show your users exactly what to expect with a screencast (video of your screen as you run your program). Notably, because of their security problems, iframes cannot be used for Github pages. Instead, add your GIF as you would an image. GIFs can also be hosted on imgur, gifly, etc. I found some detailed start-to-finish GIF-adding instuctions, It seems that some cool kids have even gone so far as to include screencasts in their PRs. Wowza.
- To make a video for a terminal program, you can make a text "video" with asciinema.
- Badges can quickly give your users information about build status, dependency checks, what version of a framework is used, and even where your project was built (the Recurse Center has it's own badges, which many participants put on their projects with pride). Most badges are added by copy-pasting some badge-creating HTML. However, some languages have entire libraries of badges (here are GO's & JS's). Because these badges are informative, look rad, and making your own badge is easy with tools such as are provided by Shields.io and badger, badges have been cropping up everywhere, and some efforts are being made to standardize and simplify their text so they can continue to be the speedy information providers we hope they will be.
- For those who love a little sparkle, emojis are also supported to help you personalize your docs with your normal fab style.
Documentation as a thinking aid
Get ready to write awesome docs by practicing clear thinking while you code. Especially as I learn how to scope projects, I find that writing some form of documentation at every stage of the project helps me break functions into tasks and keep the "big picture" goals of the project in sight.For me, there are two ways to do this:
- At the beginning of a project, create comments for each action your code needs to take. You'll likely find that you have just described each of the functions you will need.
- As you write each function, give yourself a docstring describing what the function does, including its inputs and outputs.
If you're using Python, docstrings are written in the first line of a function, class, or method and enclosed in triple quotations, like this: """ Description of function here """. Other languages, including Java & Swift, support docstrings as well (see Wikipedia for more examples). Documenting individual functions not only allowed me to organize my thinking while I was planning the project, but if I put off my documentation until I was finished, it prevented my complete confusion when looking back. It's much easier to summarize something when you have an "outline" of docstrings in front of you!
Doc Generation
Generating your docs from comments and docstrings is a powerful way to jumpstart your documentation. Many languages and frameworks have their own tools available, or your can explore something more generic like Gitbook.
Tools and Resources
The Write the Docs Documentation on Writing Documentation (say that four times fast!) is a spirited guide that walks you through the paces with an emphasis on the "why" of each step. Definitely worth a read (and probably a follow on the twitters if you do that).The Drupal project has its own guidelines, as do most larger open source projects. Reading and getting a sense of what has worked for others (and thinking about what makes sense for you!) is the best way to make informed decisions about what information will be most helpful for your project. The headings I listed--Introduction, Requirements, & Installation--are considered the “bare bones.”.
Grip is a tool that allows you to view your documentation locally. If you find yourself committing to Github in order to view and then make additional changes to your Markdown, this is going to be a real time saver (and result in a much cleaner commit history)!
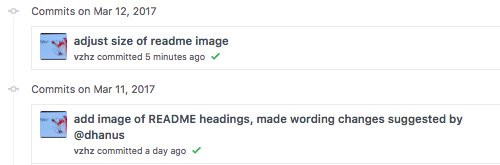
Don't you hate when you need to make a second, third, or fourth commit
as you tinker with the size of an image? Never again!
The beautiful-docs repo has its own list of excellent docs and resources to aid doc creation.
Rich Bowen's call for better docs critiques examples of some of the best documenation out there, and it is definitely worth a read. He is involved with the Apache Software foundation, which has some of the best documentation I've seen (here's an example).
Best of luck with the communication side of your programmin'. If you remember to write the documentation your future self would want to have and clear your head by spending some time experimenting with starting documentation early in your projects, you'll be well on your way and ready for all those bell-and-whistle resources I included here.
Time to go out into the world and write some fab docs!